Life Drawing: Risk-taking
You don’t have to take big risks to be considered a risk-taker. I believe everyone is a risk-taker to some extent.
It could be considered a risk when you shut off your alarm to gain an extra five minutes of sleep in the morning. There’s always the possibility that you might oversleep, but there’s also the chance that you’ll wake yourself up in five minutes.
It could also be considered a risk when you decide to order something new at a coffee shop you frequent. There’s always the possibility that you might spend money on a drink you’ll hate, but there’s also the chance you’ll discover your new favorite flavor.
The same principle applies to almost any choice you make, even the bigger ones. The payoff for a bigger risk could be great, but it could also be devastating depending on the context. Being bold is good, but one must never be reckless. There’s always a healthy balance with any of these things.
Now, you may be wondering, “what does risk-taking have to do with art?”
Everything! It has everything to do with art!
The canvas or paper always starts off “perfect” and without blemish. The artist must be brave enough to make the first mark on the paper. Artists must also make bold decisions when it comes to fixing a piece, because there’s always the possibility that the new adjustments will make the original drawing worse.
On that note, I want to talk about the visually boring artwork I just created.
So many little things went wrong with this piece, and the sad part about it is that these “wrong things” were totally preventable (I’ll discuss this more in the technical portion of this blog). Consequently, my “finished result” appeared flat and boring. Although the live drawing session portion of my work was finished, I didn’t feel that way about the piece itself. I left it alone for almost two days because I was too frightened to try and fix it.
I thought to myself, “what if I make it worse?” “What if I get an even worse grade on this assignment because I tried to fix it?”
This thought pattern was disrupted when I told one of my classmates about the drawing. She quickly recommended that I attempt to fix it. My response to her was, “What if I hate the changes that I make?” She laughed a little and said, “You already hate it now, so nothing would change that fact even if you did ‘ruin’ it. But what if you try fixing it, and it turns out better?”
She’s so wise.
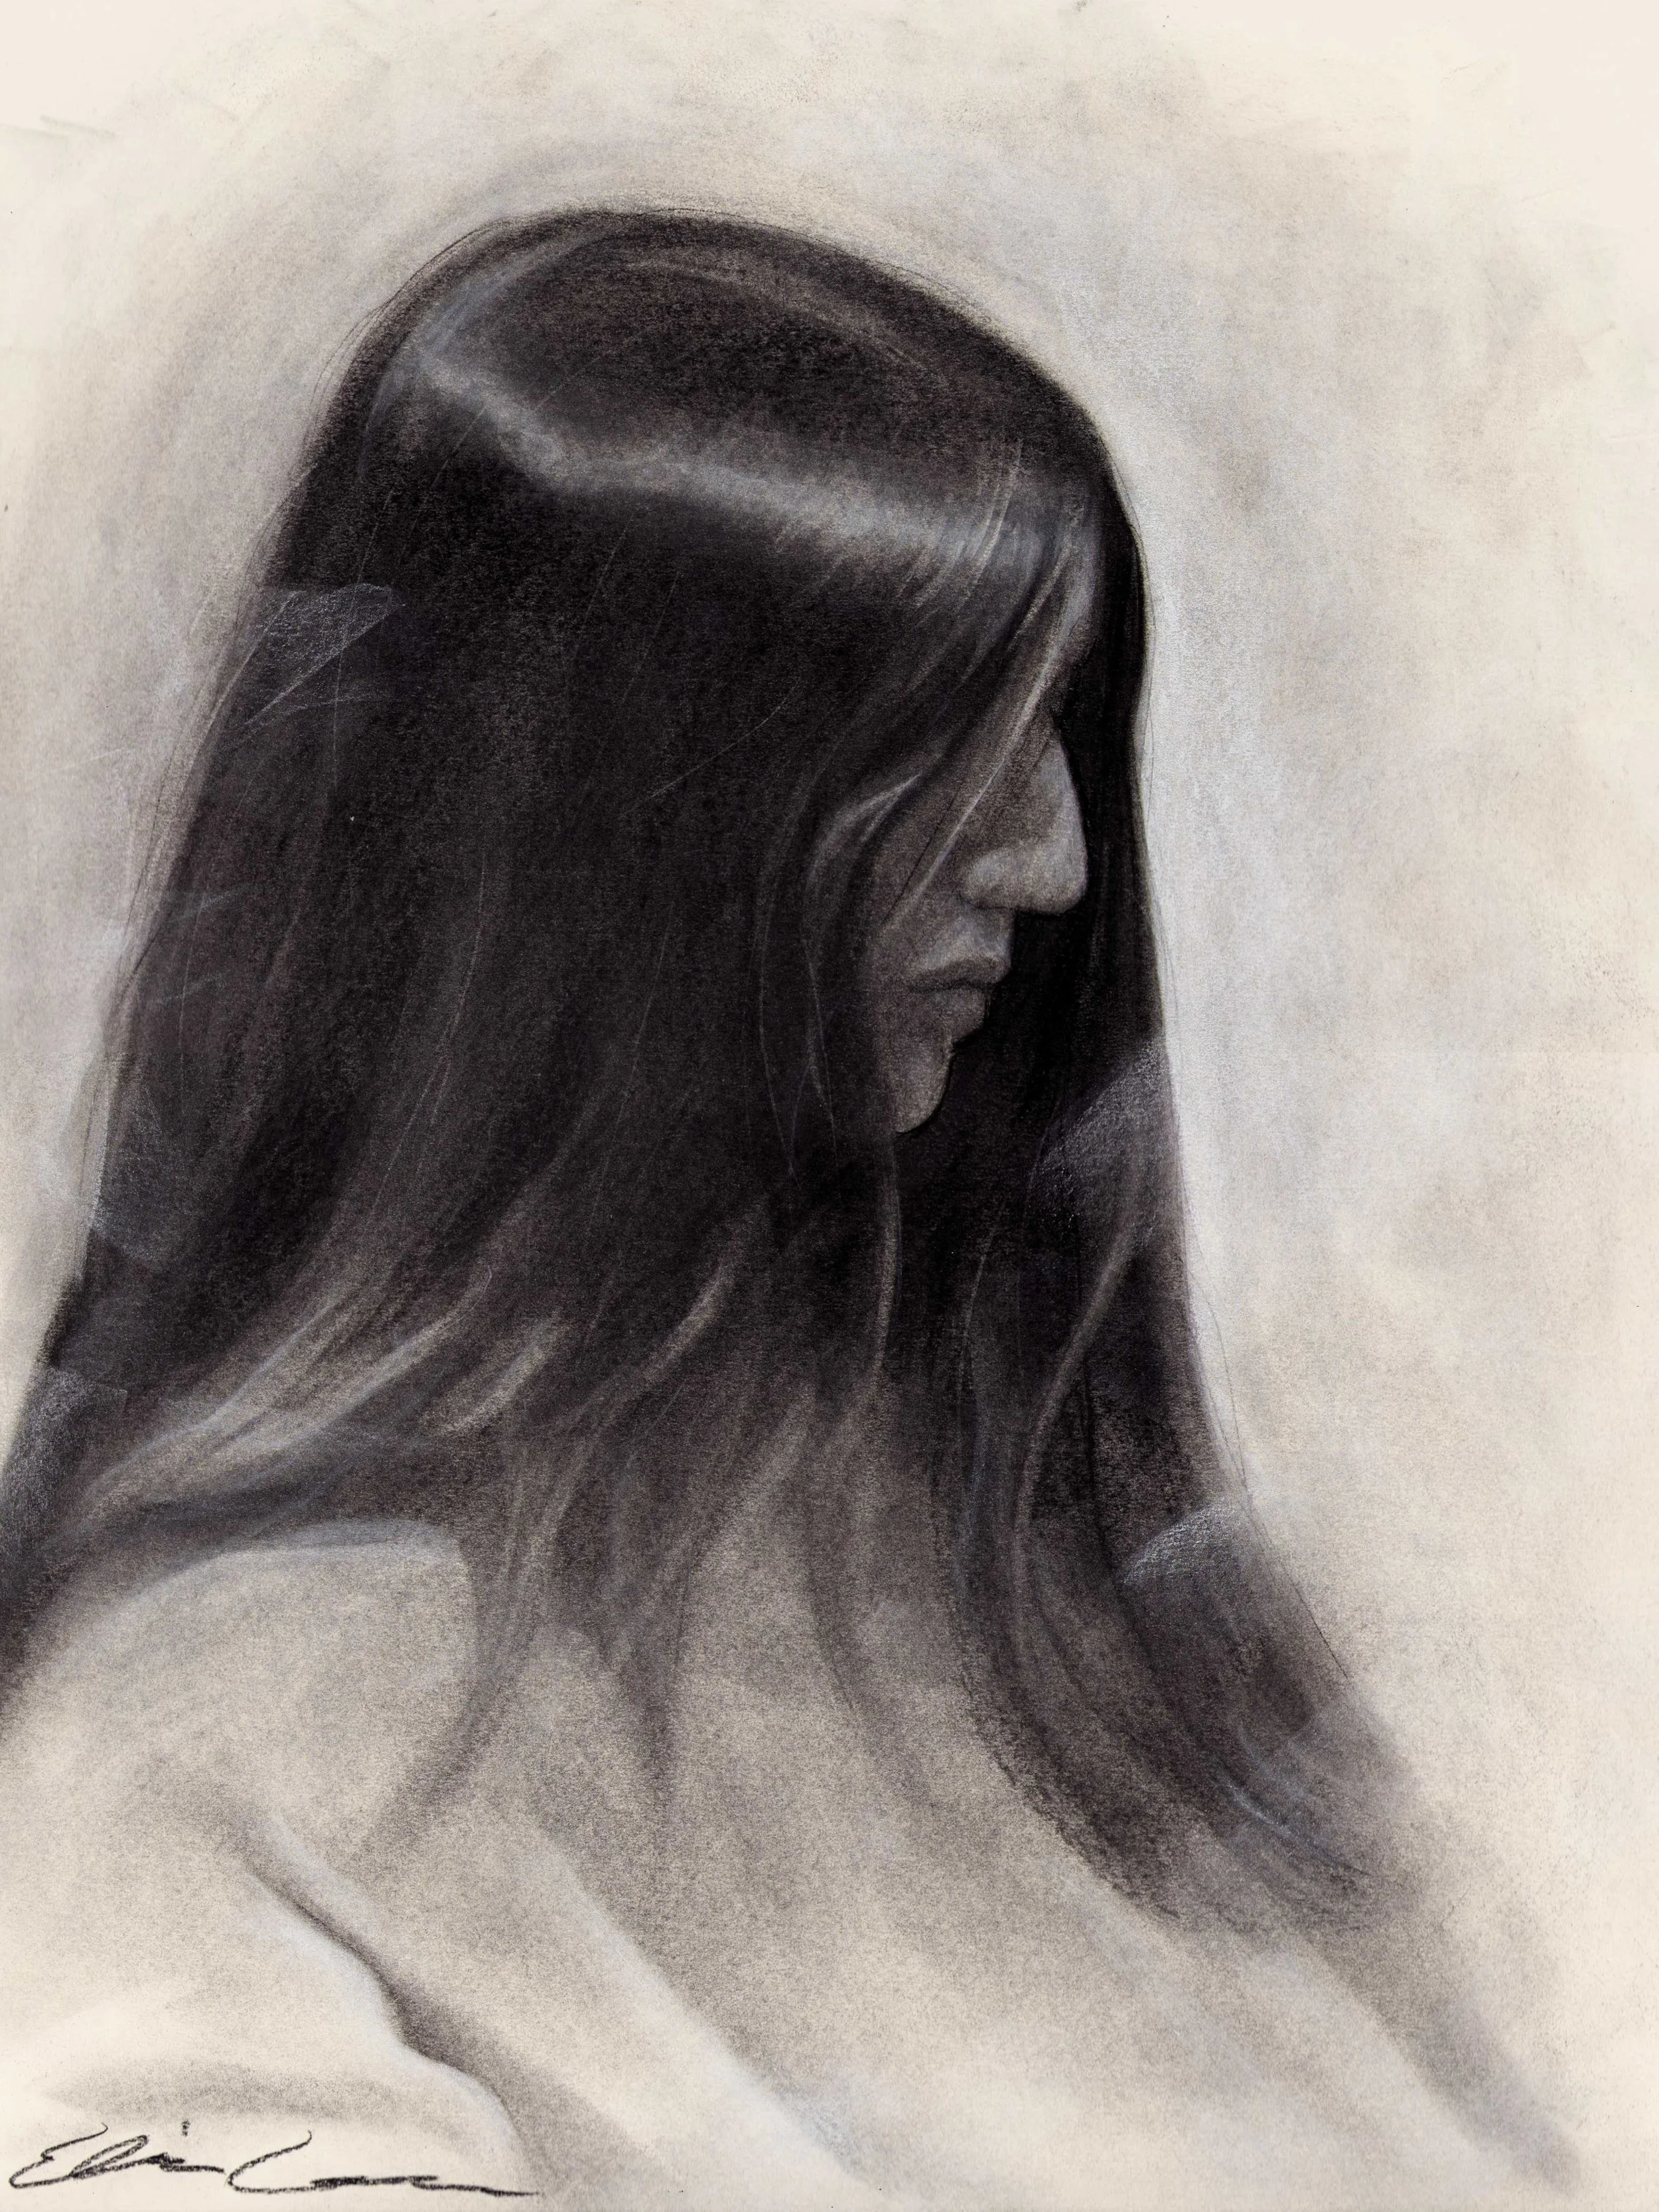
Suddenly, I had a possible solution to my problem, but it was certainly risky—no, very risky. My work needed brighter highlights and deeper shadows, and I suddenly wanted to experiment with white charcoal. However, there was a possibility that my work could be tainted with an ugly shade of blue/gray from the black charcoal mixing with the white charcoal. Luckly, I had sprayed my paper with a fixative, so I believed my work would be okay with this “buffer” layer. My guess was that it would prevent the charcoals from mixing.
Like I said earlier, risk-taking is good but not at the expense of being reckless. Therefore, I decided to test my theory on a separate sheet of paper. Sure enough, my hypothesis was correct. So, I decided to apply this method to the actual artwork.
I’m so glad I took that risk because it brought life back into the portrait.
Now, I’m not saying that this blog is your sign to “take that risk!” You and I don’t know the outcome to any given choice, which is why it’s called a risk. But what I am saying is that it is okay to take chances, because sometimes…it can be worth the risk. Success is never guaranteed, but that doesn’t automatically make failure imminent.
Lighting
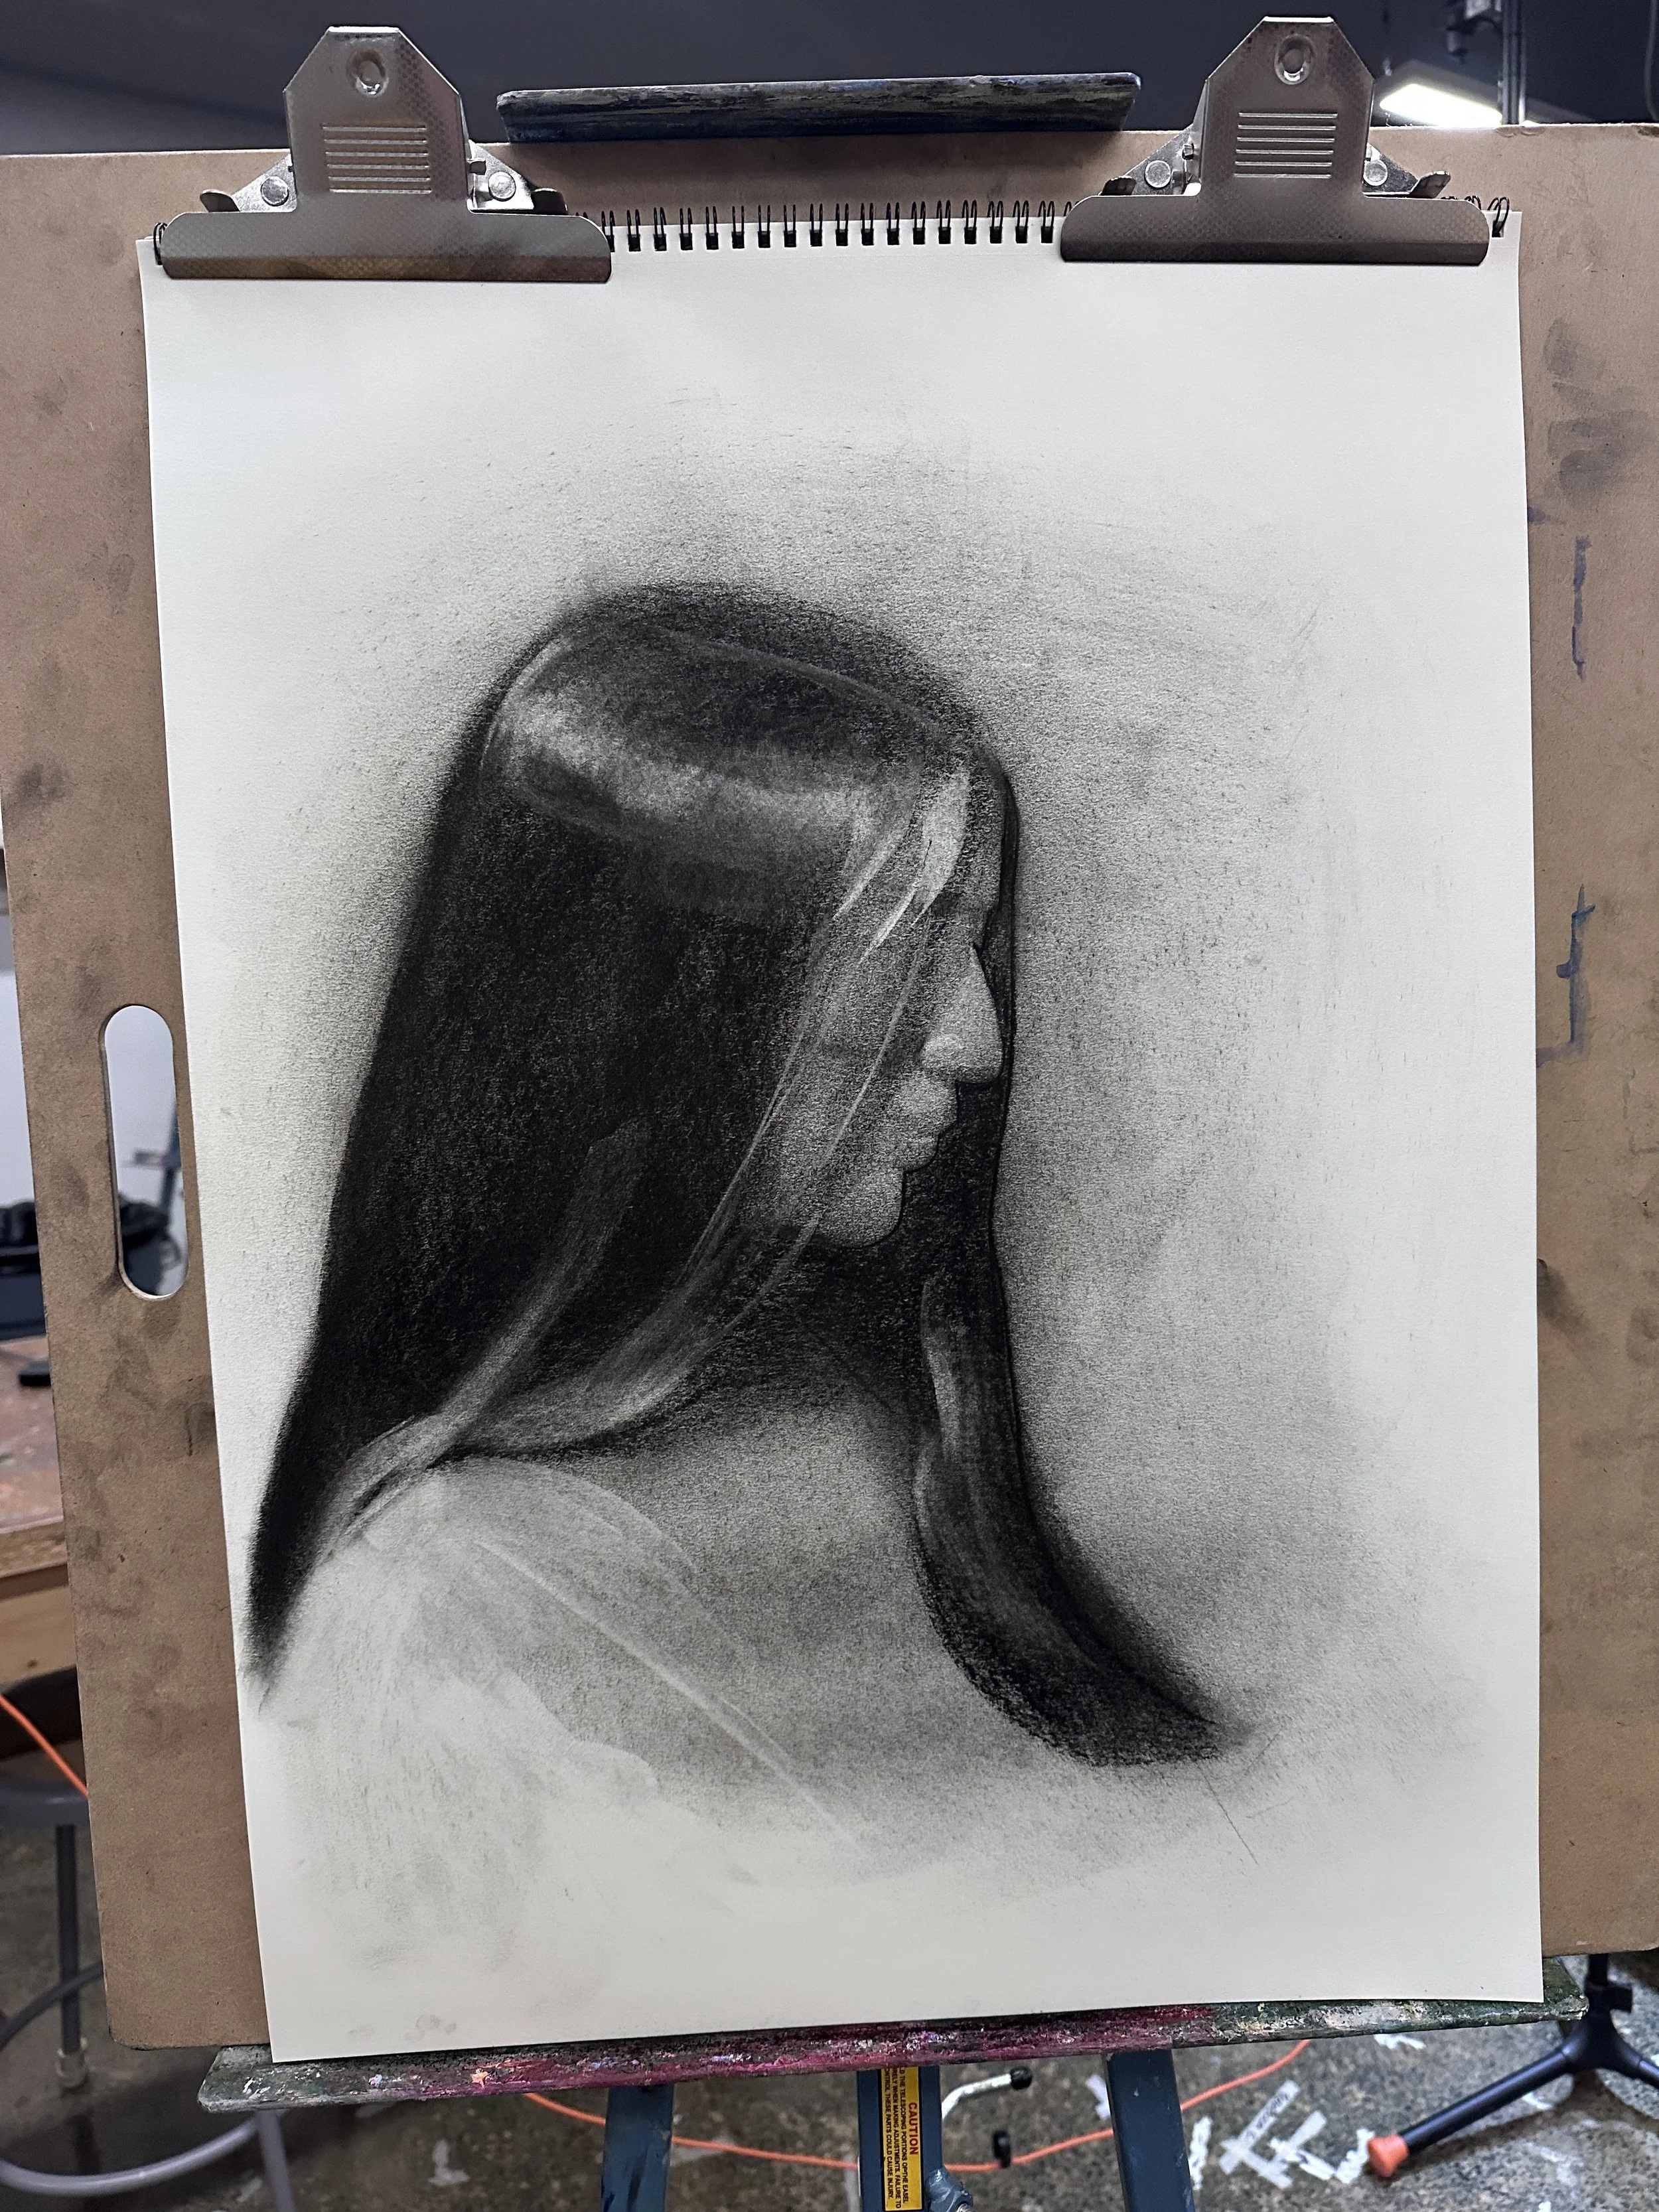
The lamp was placed above / behind the model, and I unfortunately didn’t catch that placement until it was too late to fix. As a result, the model’s face was evenly lit and in the shadows… with the exception of the tip of her nose being completely highlighted.
Linear Drawing
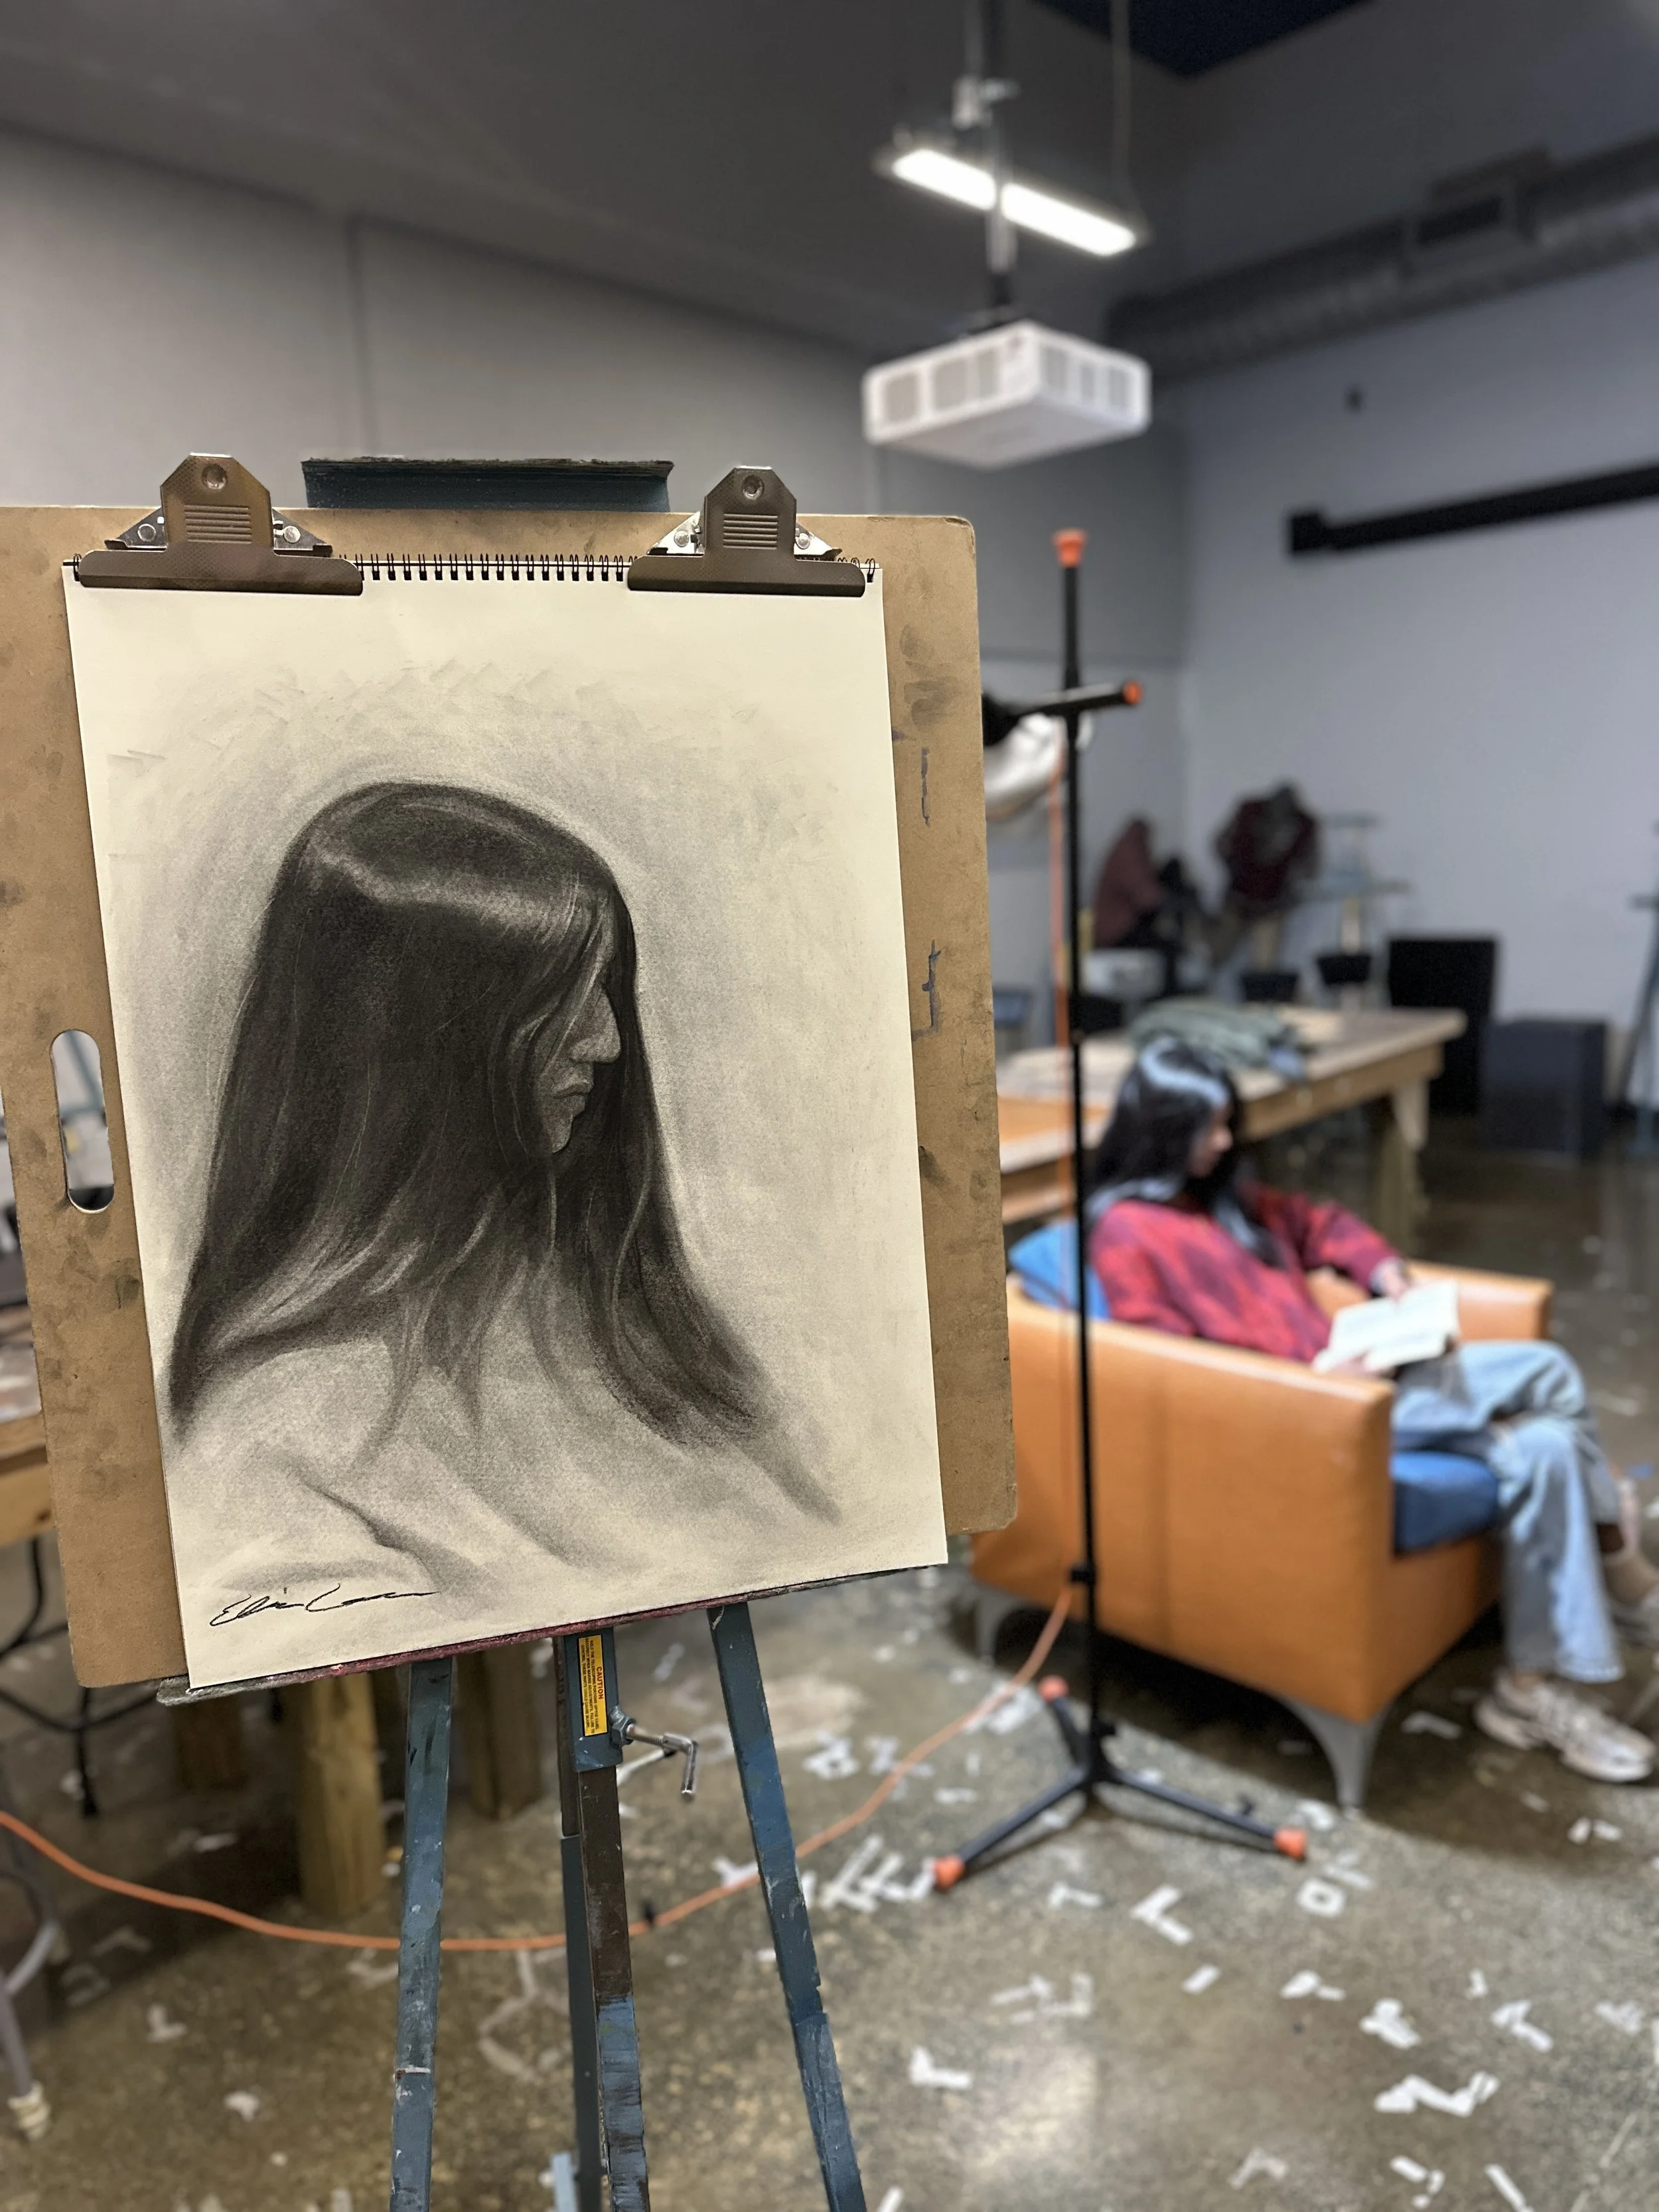
First, I began drawing the model’s side profile. I mapped out the basic proportions and then sketched the general facial features / shapes. As the session progressed, the model’s hair began to hide most of her facial features. As a result, I decided to make her hair the showcase of this drawing.

Value Block-In
Next, I blocked in the most basic values. To accomplish this, I placed the deepest shadows and smudged the entire paper to create a midtone. Afterwards, I used my eraser to carve out the highlights. My end goal was to make the hair very expressive and to make the subject appear very mysterious.
Completion
Lastly, I finished the drawing by indicating additional details. However, I was not content with the result, so I used a white charcoal stick to enunciate certain areas of the paper.
Medium: Charcoal
Duration: 3 hours